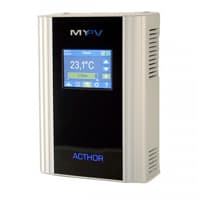
my-PV AC•THOR / AC•THOR 9s
Controls my-PV AC THOR PV power manager via Modbus TCP
This template connects the my-PV AC THOR and AC THOR 9s PV power managers via Modbus TCP. It reads power output and temperature, and allows control of operation mode, max DHW temperature, and power timeout.
- Protocol
- Modbus TCP
- Connection
- Ethernet, Modbus TCP
- Registers
- 5, read and write
- Brand
- my-PV
- Key readings
- Power · Temperature 1
- Available commands
- Max DHW temperature · Operation mode · Power timeout
- Compatible models
- AC•THOR · AC•THOR 9s
- Last updated
Registers (5)
2 read, 4 write
| Name | Unit | Access | Address (Hidden until you enter your email) | Function (hidden) | Type (hidden) |
|---|---|---|---|---|---|
| Read Power | kW | Read and write | |||
| Read Temp 1 | °C | Read | |||
| Set WW1 Temp max | °C | Write | |||
| Set Operation mode | Write | ||||
| Set Power Timeout | s | Write |
Loading registers…
Send your device list
If a device is not in the library yet, we build the template for free as soon as we have the register data.
Use cases
- Monitor real-time power output and tank temperature of the AC THOR on a live cloud dashboard.
- Set the maximum DHW temperature remotely to prevent overheating or to adjust for seasonal needs.
- Create an alert when the measured temperature drops below a defined threshold for more than 15 minutes.
- Switch the AC THOR operation mode remotely to pause heating during grid peak tariff hours.
- Log excess PV power usage over time to generate self-consumption reports for your customer.
- Automate heating from the grid during negative spot price windows by adjusting the operation mode via the platform.
Installation
Open the AC THOR web setup, assign a static IP address, and set the control type to Modbus TCP with a control timeout of 60 seconds.
Connect the AC THOR to the same local network as your ModbusCloud Gateway using an Ethernet cable or a reliable Wi-Fi bridge.
In the ModbusCloud portal, add a new Modbus TCP device and enter the static IP address and default TCP port (502) of the AC THOR.
Import the my-PV AC THOR template from the ModbusCloud template library and assign it to the newly created device.
Verify that readings such as Power and Temperature 1 appear correctly on the dashboard, then test a control action like setting the max DHW temperature.
Ensure the AC THOR firmware is up to date so the Set Power Timeout register address matches the corrected mapping in template version 1.0.3 or later.
Things to watch for
The gateway cannot connect to the AC THOR over Modbus TCP. What should I check?
Confirm that a static IP address is configured in the AC THOR web setup and that the control type is set to Modbus TCP. Verify both devices are on the same subnet and that no firewall is blocking TCP port 502.
The Set Power Timeout control does not seem to work correctly.
The register address for Set Power Timeout was corrected in template version 1.0.3. Update both the template in ModbusCloud and the AC THOR firmware to the latest versions.
What happens if the Modbus TCP connection is lost?
The AC THOR uses a control timeout, which should be set to 60 seconds. If no valid Modbus command is received within that period, the device falls back to a safe default state.
Can I use this template for both the AC THOR and the AC THOR 9s?
Yes. Both models share the same Modbus TCP register map. The template is compatible with the AC THOR (up to 3 kW) and the AC THOR 9s (up to 9 kW).

Want to see how it works?