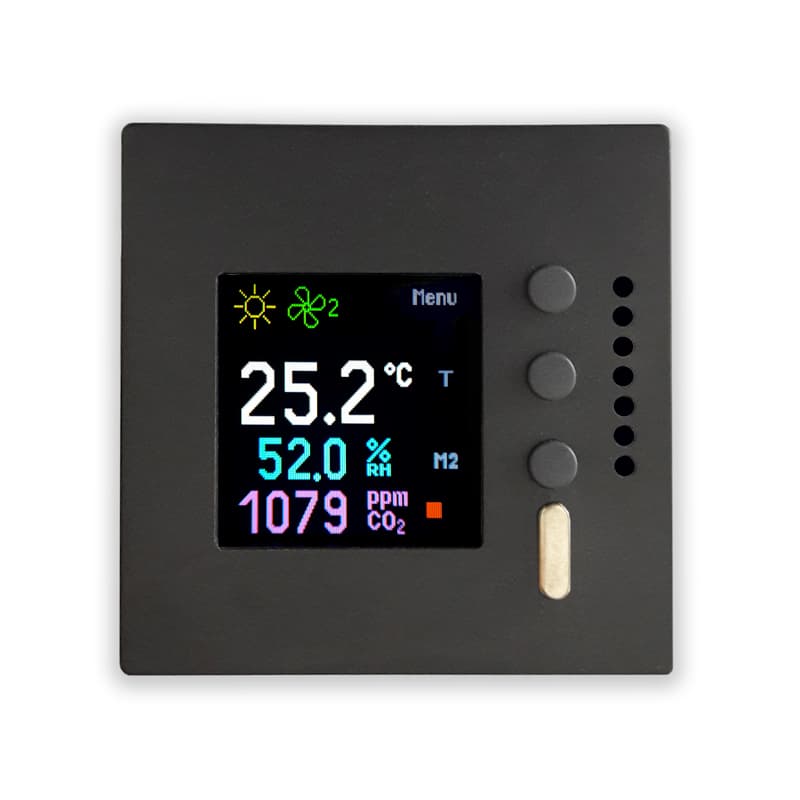
Regmet CHM1CF - TFT display controller
Displays temperature, humidity, and CO2 on a TFT controller with three-button control.
The Regmet CHM1CF is a TFT display controller that communicates via Modbus RTU over RS485. This template reads room temperature, humidity, and CO2 concentration, and allows remote setpoint adjustment and symbol control through the ModbusCloud platform.
- Protocol
- Modbus RTU
- Connection
- RS485, 19200 baud
- Registers
- 22, read and write
- Brand
- Regmet
- Key readings
- Temperature · Relative humidity · CO2 concentration · Mode S1 to S3
- Available commands
- Required temperature · Required humidity · Required CO2 · Symbol positions 1 to 3
- Compatible models
- CHM1CF
- Last updated
Registers (22)
6 read, 19 write
| Name | Unit | Access | Address (Hidden until you enter your email) | Function (hidden) | Type (hidden) |
|---|---|---|---|---|---|
| 1: 0x02 Relative humidity | % | Read | |||
| 0: 0x01 Temperature | °C | Read | |||
| 18: 0x19 Mode S3 | Read and write | ||||
| 16: 0x17 Mode S1 | Read and write | ||||
| 17: 0x18 Mode S2 | Read and write | ||||
| 5: 0x06 CO2 concentration | ppm | Read | |||
| 9: 0x10 Required humidity | % | Write | |||
| 8: 0x09 Required temperature | °C | Write | |||
| 76: 0x77 Offset temperature | °C | Write | |||
| 28: 0x29 Status register | Write | ||||
| 33: 0x34 LCD contrast | Write | ||||
| 24: 0x25 Symbol at position 1 | Write | ||||
| 25: 0x26 Symbol at position 2 | Write | ||||
| 26: 0x27 Symbol at position 3 | Write | ||||
| 37: 0x38 LCD symbol color | Write | ||||
| 36: 0x37 LCD value color | Write | ||||
| 6: 0x07 (User value 1) | Write | ||||
| 7: 0x08 (User value 2) | Write | ||||
| 39: 0x40 Bit Field (external values) | Write | ||||
| 35: 0x36 LCD backlight time | s | Write | |||
| 13: 0x14 Required CO2 | ppm | Write | |||
| 77: 0x78 Offset relative humidity | % | Write |
Loading registers…
Send your device list
If a device is not in the library yet, we build the template for free as soon as we have the register data.
Use cases
- Monitor room temperature, humidity, and CO2 concentration on a live cloud dashboard for each zone.
- Adjust temperature and humidity setpoints remotely without sending a technician to site.
- Create an alert when CO2 concentration exceeds a defined threshold for more than five minutes.
- Assign predefined status symbols to the three display positions remotely to indicate system states.
- Log indoor air quality trends over time and generate reports for building management or compliance.
- Calibrate temperature and humidity offsets remotely using the offset registers at addresses 76 and 77.
Installation
Wire the Regmet CHM1CF to the RS485 bus of your ModbusCloud Gateway, connecting A, B, and GND terminals.
Set the Modbus slave address on the CHM1CF according to the device documentation, ensuring it does not conflict with other devices on the bus.
Configure the gateway serial port to 19200 baud, 8 data bits, even parity (1), and 1 stop bit to match the CHM1CF default settings.
Import the Regmet CHM1CF template from the ModbusCloud template library and assign it to the correct gateway and slave address.
Verify communication by checking that live temperature, humidity, and CO2 values appear on the ModbusCloud dashboard.
If needed, adjust the calibration offset registers for temperature and humidity through the template to match a reference instrument.
Things to watch for
The gateway cannot communicate with the CHM1CF. What should I check?
Verify that the baud rate is set to 19200 and parity is set to even (1 stop bit) on both the gateway and the device. Also confirm that the A and B wires are not swapped and that the Modbus slave address matches the template configuration.
Temperature or humidity readings seem slightly off compared to a reference sensor.
Use the calibration offset registers at address 76 (temperature) and address 77 (relative humidity) to apply a correction. These can be written remotely through the ModbusCloud template.
Can I display external values on the CHM1CF screen via Modbus?
Yes. The bit field register at address 39 controls whether the display shows external values. Set the appropriate bits through the template to enable external value display, then write the desired values to the corresponding registers.
How do I assign a symbol to one of the three display positions?
Write the symbol number (1 to 163) to the corresponding symbol position register (position 1, 2, or 3) via the template. Each symbol can be displayed in a configurable color set through the symbol color register.

Want to see how it works?