








All topics
On this page
The tariff split works on the register with the import meter reading, a counter in kWh that only increases. You define the off-peak hours and the portal counts all other hours as peak. You set up one tariff schedule per register. The schedule also applies to earlier months, as long as their readings are still in the history.
What you need
- The role Owner, Admin or Technician in your organisation. A team member with the read only role sees the consumption but cannot change any settings.
- A kWh meter as a Modbus device on the gateway, with a register for the import meter reading in kWh.
- The start and end times of the off-peak hours from the energy contract.
Open the Tariff tab
The Tariff tab appears on the gateway page as soon as a register of the gateway has the unit kWh.
Open the gateway list
Open Gateways in the menu.
Open the gateway
Open the gateway where the kWh meter is connected.
Choose the tab
Choose the Tariff tab. Under Tariff split, each linked kWh register has a card with the name of the Modbus device and the register.
The portal only creates a card for a register that is linked as a meter reading in kWh. If you see Energy meter not linked yet, follow the steps in the next section first. If the tab stays empty, ask for the kWh meter to be linked through Get help. Include the gateway and the Modbus device.
Link the register of the kWh meter
After these steps, the portal knows which register holds the import meter reading. The button only appears on the Energy meter not linked yet card.
Open the window
Click Open energy setup. A window with two steps opens.
Check the type
Check that the kWh meter is set to Netmeter (grid meter).
Go to the registers
Click Next.
Choose the role
For the register with the import meter reading, choose Import van net (kWh) (grid import in kWh). If the register has import in its name, this role is already selected.
Save the link
Click Save. Under Tariff split, there is now a card for this register.
Set up the tariff split
The tariff schedule defines when the off-peak tariff applies, in the time that the energy contract uses.
Start the schedule
Click Set up on the register. The Set up tariff split window opens.
Enter the name
In Name, enter a name for the schedule, such as the one on the contract. The default is Economy 7.
Choose the daylight saving mode
In Timezone / DST, choose Follows DST (named zone) if the off-peak hours start at the same clock time in summer and winter. If they move by one hour in summer, choose Fixed offset, no DST.
Choose the timezone
In the list below, choose the timezone, such as Europe/Amsterdam, or the offset, such as UTC+01:00 (no DST).
Enter the off-peak hours
In Off-peak windows, enter the start and end time of the off-peak window. The default is
00:30to07:30.Add a window
If the contract has another off-peak window, click Add window. A row appears with
13:00to16:00.Fill in the second window
If you added a window, enter the start and end time in the new row.
Name the tariffs
If you want other names in the chart and the report, enter them in Peak label and Off-peak label. The defaults are Peak and Off-Peak.
Save the schedule
Click Save. The message Tariff schedule created appears and the card shows the consumption of this month.
If you leave the default GMT / UTC+00:00 (no DST), the off-peak hours are one hour later in Dutch time. In summer that is two hours. With Follows DST (named zone), the list defaults to Europe/London.
An off-peak window does not run past midnight. For 23:00 to 07:00, the portal shows End time must be after the start time. Make two windows instead, 23:00 to 00:00 and 00:00 to 07:00.
The windows apply to every day of the week. You cannot set a weekend that falls under the off-peak tariff all day separately.
Calculate an indicative amount
If you enter prices per kWh, the portal calculates an amount for the consumption. This amount is an indication and not an official invoice. Adding prices to an existing schedule counts as a change, so first read the warning under Change or delete a schedule.
Open the window
Click Edit on the register. If the Set up tariff split window is still open, continue there.
Show the price fields
If the price fields are not visible yet, click Indicative rates (optional).
Choose the currency
If you do not calculate in euros, choose the currency in Currency.
Enter the peak price
In Peak per kWh, enter the price per kWh, such as
0.30.Enter the off-peak price
In Off-peak per kWh, enter the price per kWh, such as
0.12.Enter the standing charge
If you want to include the standing charge, enter the amount per day in Standing charge per day.
Save the prices
Click Save. Below the chart, Indicative amount now appears.
The amount is the consumption times the price per tariff, plus the standing charge for each day with readings. If you click Hide before you save, the portal stores no prices, not even the prices that were already there.
View the consumption per tariff
The card of the register shows the consumption of the current month per tariff and as Total. The bar chart stacks peak and off-peak for each day. You choose another month with the arrows (Previous month and Next month) or in the month field between them.
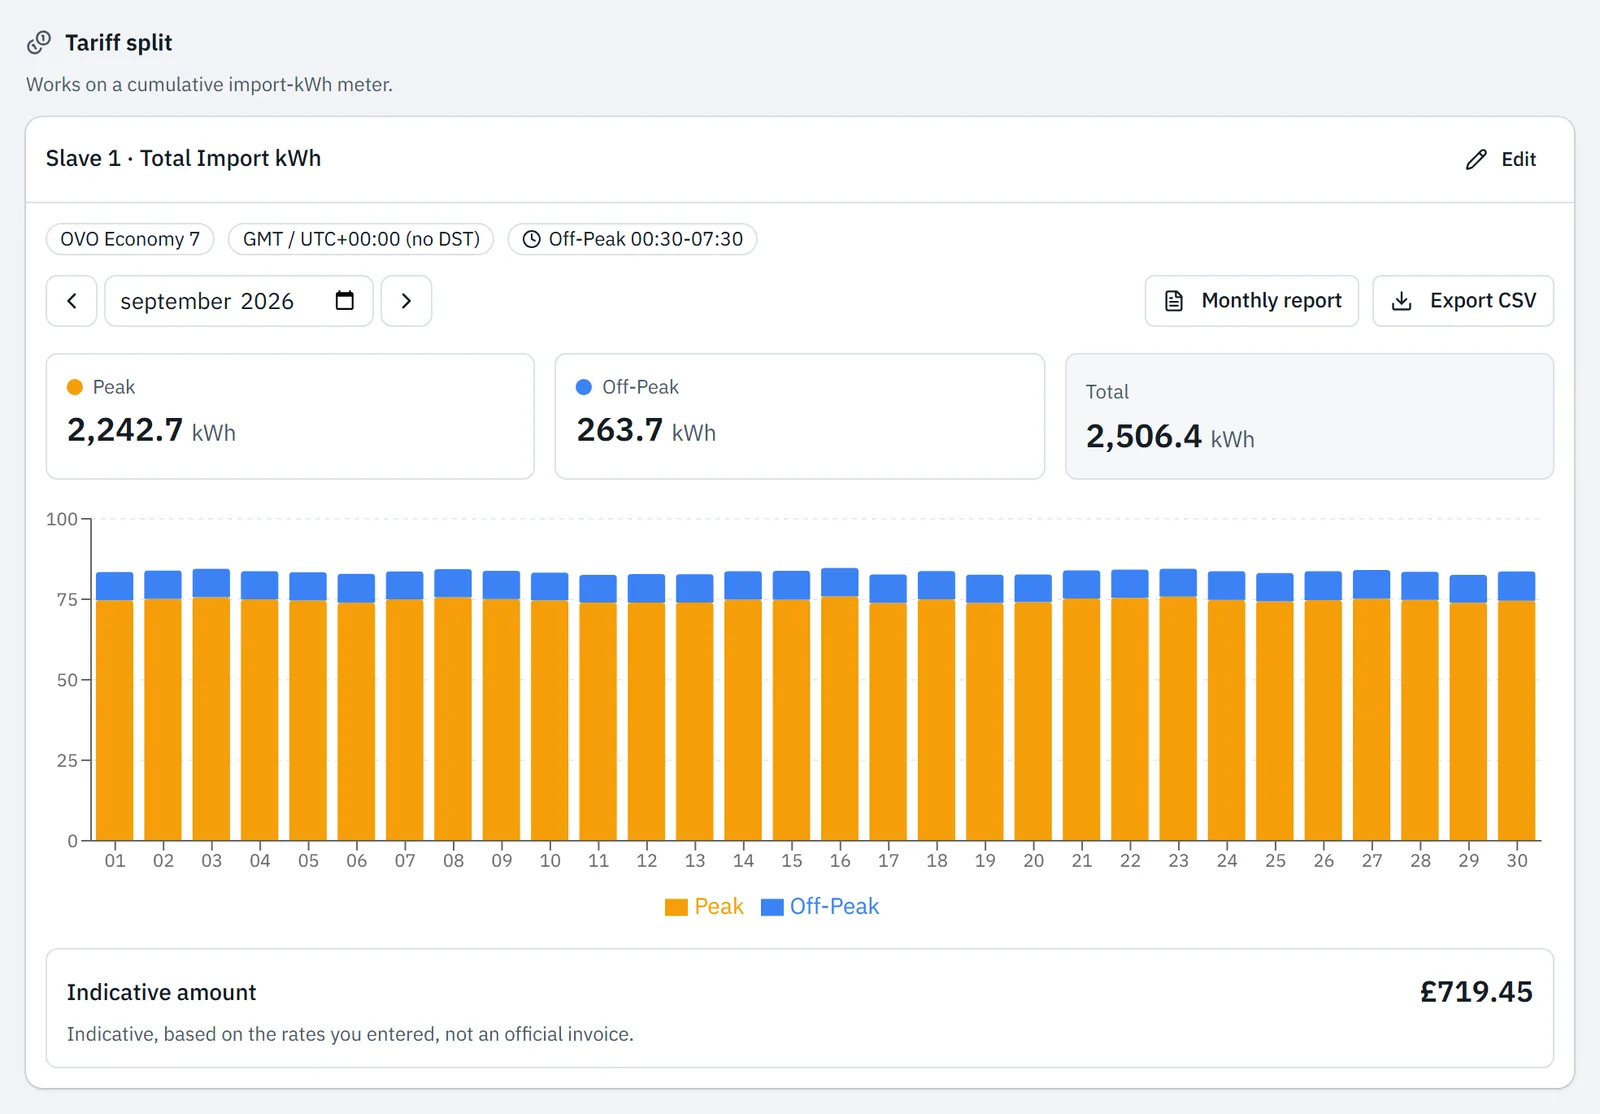
The portal calculates the end reading minus the start reading for each time window. If the tariff changes between two readings, it works out the meter reading at that moment from those two readings. If the meter reading drops, for example after you replace the kWh meter, the portal counts that drop as 0 kWh.
If two readings are more than 15 minutes apart, Gaps in data, interpolated appears above the chart. The portal spreads the consumption in such a gap evenly over the time. If the gateway reads the kWh meter less often than once every 900 seconds (15 minutes), this message always appears. You change the interval as described in Choose the polling interval.
The portal stores the daily totals per tariff every night. They remain when the individual readings disappear after the retention period. The periods are listed in Retention periods and exporting your data.
Download the monthly report and CSV
The monthly report puts the month you are viewing in an overview that you can print or keep as a PDF.
Open the report
Click Monthly report. The report opens in a new tab of your browser.
Print or save
Click Print / PDF. Print the report in the print window of your browser, or save it as a PDF.
The report shows the kWh, the price per kWh and the amount for each tariff. Below that are the standing charge, if you entered one, and the total. Without prices, the report shows only kWh.
For the figures per day, click Export CSV, next to Monthly report or above the report. The file has the kWh per tariff and the total for each day. A day with a gap in the data has yes in the Gap column. The columns are separated by a semicolon and the numbers use a point as the decimal separator.
The monthly report is not sent by email. A scheduled report from Create and schedule reports does not contain the tariff split either.
Change or delete a schedule
You change a schedule in the same window where you set it up. New off-peak hours also apply to earlier months, because the portal recalculates the split from the individual readings after you save.
Open the schedule
Click Edit on the register. The Edit tariff schedule window opens.
Change the settings
Change the name, the timezone, the off-peak hours or the prices.
Save the change
Click Save. The message Tariff schedule updated appears.
To delete the schedule, click Delete in the same window. The schedule disappears immediately, without a confirmation prompt.
Updated on 7 October 2026
Still stuck?
Email or call us. Include the serial number of the gateway, so we can take a look straight away.
Go to support